Thursday, April 29, 2010


This evening my apple trees were suddenly shrouded in a ghost-like pallor. It was all my doing and all for their own good. The transformation was the result of my spraying the trees with a suspension of white, kaolin clay.

That clay is a commercial product, marketed as Surround and made for organic control of various pests. The pest that I’m targeting is a cute but devastating little creature called the plum curculio. As you might guess from its name, plum curculios also attack plums, as well as peaches, nectarines, apricots, and cherries. Do nothing to thwart the ‘curc’, and, depending on the season, you could end up with no apples. Zip. Nada. Rien.

I’ve used Surround unsuccessfully for many years. The stuff has to be applied repeatedly in order to be effective, every 7 to 10 days, more if it rains. Done. What I didn’t learn until recently, though, is that the trees need their dusty, white coating to be thick and in place before the first curculios poke their heads out of nearby woods. Today was the third time I layered a coating on each tree from top to bottom.

Around here, plum curculios are little threat after the third week of June, so that’s about when I will stop spraying Surround. Then other pests awaken to threaten the crop. I have other organic tricks up my sleeve for them.

-----------------------------------------------

On the pest front in the greenhouse, ladybugs are happily at work gorging on aphids. These are the ladybugs that were clustering on warm days on the inside of one of the windows in my house. Daily, I dust-busted them up and then tipped them out of the Dust-Buster all around the inside of the greenhouse.

The ladybugs have also been happily at play. I caught a couple in flagrante delicto on the water spigot in the greenhouse. The result, of course: a lot of baby ladybugs. Baby ladybugs have themselves been foraging in the greenhouse for aphids and other delectables.

Young ladybugs are cute and look nothing like the adults. They have the same red and black colors but painted on in a different pattern. And their shape is more like that of crocodiles. Bon apetit young ‘uns.

-------------------------------------------

I’m enlisting yet other creatures – nematodes -- for natural pest control out in the garden.

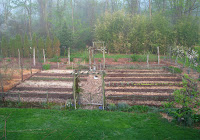
Most gardeners find radishes are quick and easy to grow. Not me. Mine typically get attacked by root borers that riddle too many of the crunchy, white roots with disgusting, brown tunnels. These same borers attack some of my turnips in autumn.

Enter nematodes, tiny worms that are barely visible to the naked eye, to the rescue. Some nematodes attack plants and some attack plant pests. Some that attack plant pests are not practical to press into service because they’re too hard or too expensive to mass produce, or they attack insects of little importance as pests, or they’re just not sufficiently virulent. Steinernema, which arrived in the mail last week in a sealed paper cup, kills many plant pests and is relatively easy to mass produce, ship, and apply.

Insect death by Steinernema nematodes is indirect. The nematode wiggles its way into whatever opening it can find in an insect’s body and, once there, releases a symbiotic bacteria from its gut. It’s that bacteria that does the killing, and it does so quickly. The nematode then feasts on the bacteria and liquefying host insect and everyone is ready for another round.

In the next day or two, I’ll be opening my nematode package, mixing the contents with water in my sprinkling can, and watering a bed in which I’ll plant radishes, followed by bush beans, in turn followed by turnips.

With luck, conditions will be just right for the nematodes to get rid of my “boring” problems.

----------------------------------------

It’s still not to late to start a vegetable garden. I will be holding a workshop, VEGETABLE GARDENING 101, at my garden 2:30-5:30 pm on May 22, covering where, when, what, and how to plant, how to nurture the soil, timely harvest, and more. The cost is $35 paid before 5/18, $40 thereafter. Space is limited, so pre-registration is necessary. Contact me through my website for more information.

Saturday, April 24, 2010

I believe I have earned the title of “phenologist.” No, I haven’t been measuring skulls to assess character, which is the realm of phrenology. Phenology, which I have been practicing, is the study of climate as reflected in the natural cycles of plants and animals.

For the past 28 years, I have recorded the dates on which various plants have blossomed or ripened their fruits. My interest was horticultural: In spring, plants blossom after experiencing a certain accumulation of warm temperatures; fruit ripening reflects, to a lesser degree, further accumulation of warmth. The amount of warmth needed to bring on those flowers or ripen fruits varies with the kind of plant, sometimes even with the variety of plant.

Depending on late winter and spring weather, blossoming dates for various plants can vary quite a bit. Microclimate also plays a role, so I’ve tried to always note blossoming on the same plant from year to year. This year, forsythia bloomed about April 1st,, the earliest I’ve ever recorded. Contrast that with last year, when it bloomed about April 15th. Or 1984, when it bloomed on April 25th! Over the years, forsythia bloom dates averages around the middle of this month, so this year is definitely early.

In the garden, seeds and seedlings can’t be sowed or transplanted until the soil has warmed sufficiently, which likewise reflects that accumulation of warmth. Some seeds or seedlings require more warmth before they can grow (or survive) than do others. Knitting all these phenomena together, I plant, for example, lettuce seeds when forsythias blossom, broccoli transplants when apples blossom, and sweet corn when dogwoods blossom.

These sunny days and balmy temperatures are heavenly – except that they’re also coaxing earlier blossoms from my fruit trees also, blossoms that could get burned by subsequent frosty nights. The earlier these trees bloom, the more chance for those blossoms to get burnt on a subsequent frosty night. The historical average date of the last killing frost around here is about the middle of May. Even warming trends might accommodate a frosty night or two that can wipe out a whole season’s harvest of apples or peaches.

Still, it’s a glorious time of year.

---------------------------------------------------

I felt healthier merely reading of a recently reported study comparing the nutrition and safety of fruits and vegetables that were grown organically with those grown conventionally. (Lairon, Denis. Agronomy for Sustainable Development, Nutritional quality and safety of organic food, A review. 30(1):33-41, 2010)

As far as minerals, little difference generally showed up between the produce grown organically and conventionally. The organic produce did, however, average significantly more iron and magnesium.

Fruits and vegetables are more than just minerals. They also contain phytonutrients, such as resveratrol (that much lauded natural compound everyone is so glad is found in red wine), which may help stave off certain diseases, perhaps even aging. Organically grown fruits and vegetables were much higher in such compounds than were conventionally grown ones.

Safety of any fruit or vegetable can compromised in a number of ways. Nitrates are a form of nitrogen that can build up to undesirable levels in leafy vegetables. Excessive nitrate intake can lead to, among other maladies, cancers and blue-baby syndrome. Nitrate nitrogen is also a form of nitrogen fertilizer used in conventional agriculture, so it’s not surprising that conventionally-grown vegetables showed the higher levels of nitrate levels. Pesticides are, whenever possible, avoided in organic agriculture, and when used, might include such toxins as microbes specifically toxic to the problem pest – Bacillus thurengienses (Dipel) for cabbage worms, for example. So again, not surprisingly, pesticide residues were much less, or nonexistent, on organically grown produce.

Microbial toxins are yet another potential hazard to our food supply. Organic and conventionally-grown foods did not differ in their levels of contamination.

I’m going to especially appreciate the organic lettuce I’ll be picking from out in the greenhouse in a little while.

----------------------------------------------

I just finished off the last of my dried tomatoes, and the canned tomatoes . . . well, they have their uses, but they’re nothing like a fresh tomatoes. I’m now on my way to fresh tomatoes, the very beginnings, as the seeds have just sprouted.

This year I’m growing a dozen varieties. In cherry tomatoes, the one to grow is Sun Gold; it’s neither open-pollinated nor an heirloom, but it is most delicious. For canning, there’s San Marzano and Blue Beech, although some of the fresh tomatoes I’m growing, such as Anna Russian and Amish Paste are also good canned. And rounding out the fresh-eating lineup are Belgian Giant, Carmello, Valencia, Soldacki, Stupice, Rose de Berne, and Nepal.

Friday, April 16, 2010


You’d think my chickens and ducks would be more thankful. Ratty, old straw bedding and manure have now been replace by fresh, new straw. But no, the chickens were nonchalant as usual, hardly noticing my work. And the ducks decided to spend the night out – not a wise choice, but then ducks aren’t know for their intelligence. The drake wouldn’t know about the housekeeping anyway because he has chosen or been directed to keep out of the house nights since the female ducks began laying a few weeks ago. He sits nearby from dusk till dawn.

Cleaning out the chicken and duck house a few times a year is little work compared to what the poultry offer in return. The chickens spend all day scratching and pecking for insects and whatever else they find in the lawn and field; the ducks dine by scooping and nibbling. All that foodstuff, along with the few grains of cracked corn I scatter in the poultry houses each evening to let the birds know where home is, get processed into the tastiest eggs I’ve ever eaten, with yolks a deep, rich, orange color. I credit my garden’s relative lack of slug problems to the chicken and ducks’ constant patrolling of the grounds. And the poultry are like moving lawn ornaments.

-----------------------------

A look in the greenhouse today brought back some not-so-fond memories of my first garden. The memory actually pre-dates my first garden by a few weeks, to the raising of the first seedlings indoors.

I then lived in a motel whose rooms had been converted into (very) small apartments. On some small shelves in my very small, dark kitchen I lined up Jiffy-7 peat pellets into which I had sown various seeds.

The seeds sprouted, then toppled over, dead – a brutal introduction to gardening and damping-off disease. It’s a wonder I didn’t give up gardening right then and there.

Investigation revealed that damping-disease is caused by a few fungi that are ubiquitous and get the upper hand when soils are too wet, when temperatures aren’t optimum for plant growth, when light is poor, and/or when nitrogen levels are excessive. Chemicals, of course, can offer control, as can sterilized potting mixes, although healthy soils and mixes house natural antagonists to damping-off fungi. By paying careful attention to moisture, temperatures, light, and nitrogen, I have hardly ever seen damping-off since that ill-fated garden beginning.

Except a couple of days ago, when I noticed a number of toppled snapdragon seedlings in the greenhouse. Too many weeds had been sprouting in my potting mix, so I had microwaved the soil and compost that went into that mix. But temperatures that soar too high can kill off the fungi that fend off damping-off fungi. High temperatures also cause a release of excessive nitrogen. In retrospect, I had created a recipe for disaster.

From now on, I’ll go back to not sterilizing the soil or compost in my potting mixes, or else paying very careful attention to “cooking” temperature (no higher than 180 degrees for 10 minutes). Careful attention to watering may still save most of those snapdragons.

-----------------------------------

Damping-off disease can be more insidious than I just described, attacking seeds even before they sprout. And that’s what I thought might be happening to my pepper seeds because, three weeks after sowing, some varieties still had not sprouted. Then again, some varieties had.

I was determined to determine whether the fault was with the seed or with the soil mix. So I re-sowed, this time putting the flowerpot of seeds and potting mix into my home-made incubator, which also, incidentally, gets a good rise out of bread dough. The temperature set at 80 degrees Fahrenheit was right near pepper’s optimum germination temperature of 85 degrees. Under such conditions, I expected the seeds to practically jump right out of the flower pot, but no, after days and days, the potting mix’s surface remained a desert.

This morning, finally, the seeds did practically pop up through the surface, and all together.

Good thing they did, because those seeds about which I had my doubts were of Sweet Italia peppers. Sweet Italia, a variety I’ve grown for many years from seeds I save each previous year, reliably yields oodles of tasty red peppers relatively early in the season.

Oh, the Sweet Italia seeds in the greenhouse? By chance, they also happened to finally sprout today. The warming mat on which they sit is at about 70 degrees Fahrenheit, still within the germination range peppers need, but further from their optimum temperature.

Friday, April 9, 2010


Up until a few years ago, I couldn’t get sufficiently empathetic to other gardener’s Japanese beetle woes. That, despite the fact that Japanese beetles are not picky eaters and descend upon gardens almost everywhere. The problem – the empathy problem, that is – was that never more than a few beetles ever made their appearance in my garden.

That situation changed – bad for my garden, good for my empathy – around 2005, when beetle numbers started increasing. Nowadays my garden has annual, full-blown outbreaks of the beetles. Last summer’s rain was good for the beetles’ egg-laying, so problems may be severe this year.

Trapping, milky spore disease, walks over the lawn with spiked shoes, and hand-picking all do their part in limiting beetle numbers, but a recent report tells of another tack: geraniums! Botanically Pelargonium, and specifically zonal geraniums, the ones with the dark zones on their leaves. When Japanese beetles eat geranium flowers or leaves, they become paralyzed for about a day, during which time they’re susceptible to all sorts of predation.

I started thinking about the beetles now, well before they are due to arrive, so that I could start propagating dozens of geranium plants to set out all over my yard this spring. Before beginning, though, I decided to have a chat with Dr. Chris Ranger, the USDA entomologist in Ohio who has been watching beetles keel over following feasts on geranium. It’s a good thing I called because Dr. Ranger quickly pointed out that Japanese beetles won’t eat geraniums unless nothing else is available.

So planting geraniums will not control Japanese beetles. For me, come June, it will be back to hand-picking and traps. On the bright side, geraniums may become a source of a natural, botanical formulation for controlling the beetles. And the flowers are pretty.

--------------------------------------------

The greenhouse is starting to fill up with vegetable seedlings for transplanting. Generally, plants to grow as transplants are tomatoes and others that that need a long season before harvest, and broccoli and others from which you pick a lot from each plant. Root vegetables generally don’t like to be transplanted because their roots want to go straight down deeply, deeper than your average seed flat, before they swell. Any disturbance and the plants die or yield deformed roots.

Beets, however, are one root vegetable that I have been transplanting successfully for a few years. One reason I start beets indoors is because their seeds don’t germinate well. Indoors, I can control moisture and temperature for best germination.

And each beet “seed” is actually a cluster of seeds in a dried fruit, so once they sprout, they come up in crowded clumps. From a seed flat, I can lift individual plants once they have seed leaves and transplant each into its own home in a compartmentalized seed tray.

And finally, some creature – a bird? – always seems to tug out small beet seedlings in the garden. Perhaps the red color in the leaves makes the bird -- if the culprit is, in fact, some bird -- mistake the seedlings for fruits. At any rate, larger seedlings that I transplant don’t suffer such affronts.

--------------------------------------------

By the end of this week, I’m hoping to have almost all the blueberry bushes pruned, both highbush and lowbush.

On the highbush varieties, I cut a few of the oldest – and, hence, thickest -- stems away or to low, vigorous branches using a saw or lopper. Then, using a hand shears and still crouched beneath a bush, I thin out some of the youngest stems wherever they are crowded. After standing back up and snipping back any straggly, gawky, or crowded branches,as well as any that are dead or broken, I’m finished with a bush.

The lowbush blueberries are easier to prune: I just lop all stems back to ground level. The best crops will be borne next year on new shoots that spring forth this year. Those stems yield a lesser crop the following year, and then I start the cycle again by lopping those lowbush blueberry stems way back again.

The problem, of course, is that there are no blueberries to eat each year their stems get lopped back. I’ve solved this problem by dividing the bed in thirds and lopping only a different third of the bed back each year.

Friday, April 2, 2010


It’s time to prune trees and shrubs!! I will be holding a PRUNING WORKSHOP at my garden (in New York's Hudson Valley) on April 10th from 2-5:30 pm. Learn the tools of the trade, how plants respond to pruning, and watch Lee demonstrate pruning of apple trees, blueberry bushes, lilac bushes, and other plants. Limited space, so pre-registration is necessary. The cost is $35 per person with pre-registration before April 6th, $40 otherwise. Contact me for registration information.

-----------------------------

As the writer of the book Weedless Gardening, I would have expected my own vegetable garden to be more weedless. I see weeds in my garden, more than in springs past.

Last summer’s wet weather has something to do with the present weed situation. In a normal summer, with its periods of dryness, drip irrigation (part of my “weedless” gardening system) pinpoints water to my garden plants without promoting weed growth in paths and between widely spaced plants. Incessant rain kept promoting lush growth everywhere.

The clear plastic tunnels that I put up to extend the harvest season of endive, lettuce, and other greens late into autumn also contributed to the present weed situation. Garden plants weren’t the only plants that thrived in those mini-greenhouses. Weeds also were able to sneak in and get some foothold.

In fact, the weed situation is not really that bad. The other day I cleared five beds, each about 3 feet wide and 20 feet long in less than an hour. I started at one end of each bed pulling out each weed along with any remains, now dead, of last autumn’s garden plants. One bed had a lot of little weeds that had sprouted. Rather than pull them individually, I decapitated them en masse by skimming just a half-inch or so beneath the surface of the ground with my sharp winged-weeder. Those small weeds are too small to re-sprout from root pieces.

Important in “weedless gardening” is not tilling the soil, which keeps weed seeds, inevitably present in any soil, from being exposed to the light that they need to sprout. By not having to till the soil and by thoroughly clearing beds of weeds and old plants, the beds are immediately ready for planting– as soon as the ground warms.

-------------------------------------------

Actually, I have one more important task to do before planting any vegetables, and that is the annual mapping out of the garden, something I generally put off as long as possible.

In theory, mapping out my garden should be easy. I “rotate” what I plant in each bed so that no vegetable, or any of its relatives, grows in a given bed more frequently than every 3 years. Crop rotation prevents buildup of pests. So one year a bed might be home to cucumbers (or its kin melons or squashes), the next year that bed might host cabbage (or broccoli, kale, Brussels sprouts, or cauliflower), and the next year tomatoes (or peppers, potatoes, or eggplants), and then back to cucumbers. Beans and peas are another family of vegetables. Simple enough.

It would also be nice to rotate carrots and other root vegetables with leafy vegetables, such as lettuce, and fruiting vegetables, such as tomatoes. Root, leafy, and fruiting vegetables have somewhat different nutrient needs, so in the ideal garden these crops are rotated to make best use of soil nutrients.

And I do like to get the most out of my garden and confuse potential insect pests by grouping different kinds of plants within a bed.

Are you beginning to understand why I put off committing my garden plan to paper each spring?

--------------------------------------------

Peas present one more wrinkle in my vegetable garden planning. A few years ago they stopped bearing well, collapsing with yellowing foliage not long after they bore their first pods.

Further investigation has narrowed the problem to – probably – one of two diseases: fusarium or aphanomyces. Both, unfortunately, are long-lived in the soil so that 3 year rotation does nothing to keep them in check. My tack is to plant some peas in a new location outside my existing vegetable gardens and, for fusarium, to use resistant varieties such as Green Arrow, Little Marvel, Bounty, and/or Daybreak.

Unfortunately, the problem is more likely aphanomyces, for which resistant varieties do not exist. Aphanomyces is a water mold, so thrives under wet conditions. So my tack will also be to keep any peas planted in my vegetable garden on the dry side, not even turning on the drip irrigation in those beds.

I’ll also be checking the plants more closely for symptoms. Plants infected by fusarium have a red discoloration to their roots. Plants infected by aphanomyces have fewer branch roots and what roots there are lack the plump, white appearance of healthy roots.